
Select Topic from Menu
The many information and product links, as well as videos, in this article, have been hand-selected to be interesting, informative, and pertinent to the subject paragraph.
Most of the items and businesses listed are ones that I personally use and would recommend to others.
Additional articles that I wrote that would be of interest to artists are listed at the bottom of this article.
What sells?
What sells is mostly determined by what items you sell. Within those items, the seller may determine which types of items are more popular and sell more and also what price points sell the best for the type of art/craft show you are doing. You will eventually get a feeling of what items sell best and at what prices. You can increase those types of items that sell well and decrease the types of items or price points that do not sell well.
It is a good idea to have items of different price points so you can encourage customers to purchase in the price range they can afford or are willing to purchase for the items you sell. A small local craft show with a $50 seller fee may sell more items in the lower price range and larger and higher-end art shows that may charge $500 for a booth area for a weekend may sell higher-end pricing items more often.
In the end, each seller will have to learn from experience and experiment with different approaches to selling to see what sells best. It is not always about what items you sell but your sales approach to the customer or how you present your work in your booth display area to name a few things.
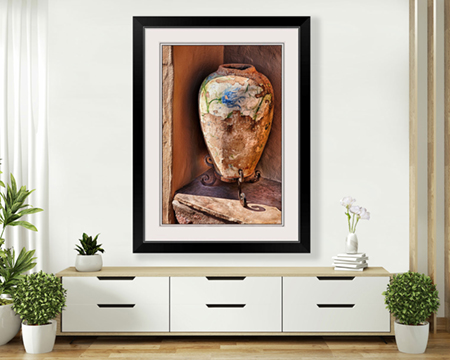
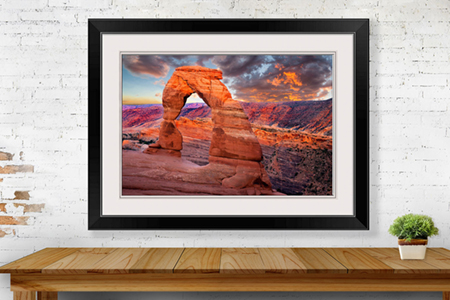
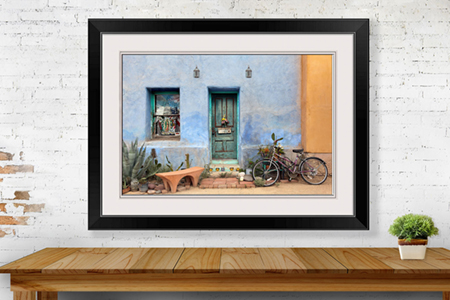
While this article is not just for sellers of photography, since I sell photography, I may reference photography from time to time. For photography, what sells in the smaller shows are mostly the matted prints or small framed prints if you offer them. You should have some larger pieces of framed art on the walls to attract people to your booth area.
In some shows, such as our local Phoenix First Friday’s events, where many of the visitors are younger, art items that sell the most may be in the $15.00 to $40.00 range. On a slow sale day, it is nice to sell even a low-cost item under $15.00 every once in a while, to keep your spirits up. In general, you will not over the long term make a decent return unless you sell some more expensive items even if those items sell in smaller quantities. On the other hand, if you sell handmade soap in the $6 to $10 range and you sell a lot of handmade soap, you will still have a great sales day and really a profitable day.
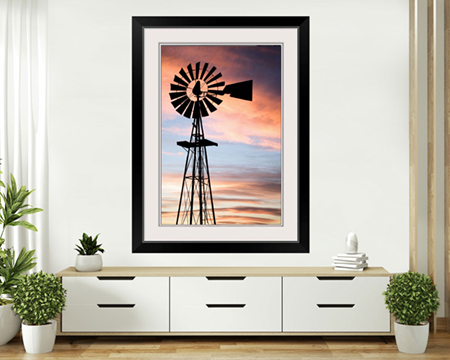
As far as which subject matter sells the best, it varies widely. Most photographers have a variety of local landscapes taken in locations near the area or State of the art shows or exhibits that they do. Landscapes are usually visually appealing to a greater audience and perhaps easier to sell than some more artistic photography. Having numerous items that have a wide appeal that can be sold to a larger audience can have its advantages. A seller may also have some items that are more unique looking for that special customer.
I also try to show my unique vision of a variety of other subjects that interest me that separates my work from other local photographers. I enjoy taking photos of old rusty cars or transportation-related themes as well as photographing interesting objects from the past. Each seller should find his or her style and try to be unique.
Having items that the customer can find a few tents down at a lower price is not ideal. Customers can recognize the passion you put into your work and see your style which attracts them to the artwork. This customer connection to the artist leads to sales.
After a while, you will see what types of items and what price ranges that your art or craft will sell at. You should look for a pattern on which type of items your customers are most interested in and purchase. While you should only create what you are interested in, your art booth should have more space devoted to the type of items that your customers are purchasing.
Knowing which items of yours sell is something that only personal experience can tell you and can vary depending on the area that you show. I have also found that some of my images are very hot and sell well for a while and then just drop off dramatically. I tend to sell out of those images, replace them with newer images and then 1 to 2 years later, bring them back for a new audience that has not seen them before.
Greeting the Customer / Customer Interaction:
If a customer enters your booth area or has been looking for a minute, greet them with your own personal statement. This initial greeting will vary with every artist and said along with a smile and eye contact is just a method of letting the customer know that you recognize their presence and you are open to assist them if needed. I vary my statements but could be “Hello”, “Welcome to my gallery” or “Let me know if you have any questions”. Some customers want interaction from the artist and some want their space.
I live near the town of Scottsdale, AZ where many higher-end galleries are grouped in a single area. When I enter these galleries, they seem to greet me with something like “How is your day going” or “Are you visiting from out of town”. As a note, since the brick-and-mortar galleries know that the vast majority of sales in this area come from out-of-town visitors, asking if you are from out of town is in some ways qualifying the customers for a higher sales possibility. For me, it is not so much what they say but the warm pleasant attitude they seem to have while saying it. They usually let me know that they can help me if I have any questions. This same technique can be used in an art show as well. 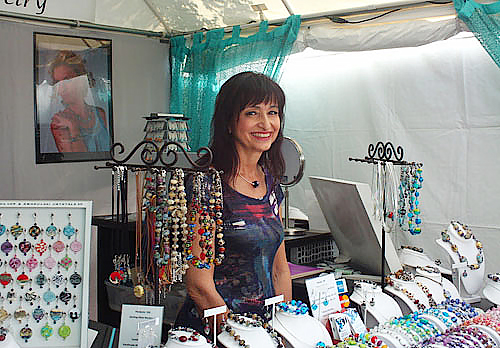
If a customer is looking at a particular art piece for an extended time, I may tell them a short story about the art piece. It is not only the art piece they are interested in but also the connection to the artist. This artist connection is something art patrons can get at an art show that they may not get at a gallery. It is a fine art to read the needs of an individual customer and how much interaction they want with the artist.
I feel it is better to always have a happy or more positive attitude when dealing with customers even if you are tired and at the end of a long day. Part of the customer experience is the joy of the purchase. They would be more likely to purchase from an artist that they have a good feeling about since the artist is connected to the artwork they are bringing home.
It also does not hurt to smile a lot like the lady in the photo is doing.
Many times, customers ask you what I would consider silly questions such as did you take all these photographs or are these paintings (not my art medium). In most cases, they are unfamiliar with how to approach the artist and are just starting a dialog with you. It is best to answer their question which can lead to a continued conversation with this customer.
Artists with different art mediums may get asked different questions from the customers. I am often asked if I am local in which I say yes since all my shows are local. An artist selling jewelry may get asked if she makes her own jewelry or if her jewelry is produced in China. Once you start selling, you will get some common questions and determine a standard answer for your customers.
On occasion, you will run into a rude customer. It is best not to deal with this negatively as this could turn off other customers in your booth. I just move on to a different customer and eventually the rude customer leaves. For the most part, the customers are very nice and often compliment your artwork. While compliments are nice, most artists would prefer to have a customer make a purchase.
When doing art shows with your standard 10 x 10 canopy, I noticed that customers are hesitant to cross over the “hidden line” on the edge of your canopy’s main entry side. They tend to look at the booth contents on tables or on the walls from a distance. Some of this is just the customer seeing if they are interested in what you sell and then decide to enter your booth or move on to the next booth. If you make the customer feel at ease and comfortable to cross that outside line into your booth, then you are doing something right. Some artists tend to have a booth too crowded with less than perfect flow which can cause customers to not enter your tent as often.
This section more geared if you sell items printed on canvas or printed on aluminum:
In the past, I started showing and offering wrapped canvas prints as an option. At that time showing photographs on Canvas was the new popular thing. While most of my works hanging on the walls are in traditional glass frames, I had about 30% on canvas. Read my article on printing photography on canvas for the fine art photographer for more information.
Canvas prints make a nice presentation that the customers seem to like. It is also convenient for the customer since they are light and come ready to hang on the wall with no additional framing needed. At that time, many full-time art show photographers went to show the majority of their art on canvas. I let my customers know if they are interested in a larger print that I offer a wrapped canvas option. The cost of printing on canvas has dropped drastically in the last few years due to the many competitors printing on canvas.
Currently, photographers have switched from showing mostly on canvas to selling photography printed on aluminum. On my recent trip to California, I even saw prints from paintings on aluminum. Showing artwork on aluminum seems to be a lasting trend. While printing on aluminum is still expensive, prices have come down allowing artists to have reasonable prices and still make a profit. One advantage with aluminum prints is the same as in canvas prints, that you do not have to frame them which brings them closer at a total price to similar sized prints that are framed.
Photographers over many years went from showing their artwork on photographic silver-based paper framed to photographs printed on inkjet paper framed to have the photographs printed on canvas to now having the photographs printed on aluminum or metal. With the items you sell, you need to look to adjust what you sell related to a different style, trend, or design changes that customers are currently interested in and adjust as needed.
General Art Show Notes:
The initial costs for getting set up to show at art fairs can be substantial. If you decide to stop doing art shows, your equipment such as a tent, walls, display cases, and tables can be sold to other artists.
Doing art shows is hard work. It does help with setup, sales, and takedown if you have another person with you but many artists do it themselves. It is not for everyone.
It can be frustrating if you go the whole day and sell nothing or very little which happens often. Selling at art shows can also be fun. I enjoy talking to the customers and sometimes they need to see you at a few shows before they purchase from you. Sometimes it is good to do the same show multiple times, so the same customers can see you again even if they had not purchased from you before. This can give the customer the viewpoint that you are a more serious seller and if they purchase from you, they may be able to find you again.
It is best to learn about the art show market, how well your art sells, and practice your selling skills on smaller and less expensive local art shows before going to the much more expensive art shows competing with seasoned full-time art show professionals. This can save you money during your learning curve.
Many art shows have volunteer sitters who will sit in your booth for a short time so you can take a short break. They will not sell your items but will watch your booth while you are away.
The artists must be at the art show for the entire show at most all art shows.
Keep your cash on you and not store it in a cash box or hiding place unless it is just your coin change.
While you should sit in your chair to rest sometimes, it is best to stand if you can during busy times.
Having people in your booth brings in more people to your booth.
Special security precautions are needed for artists who sell jewelry not only during show hours but when you are setting up, packing up, transportation, and hotel room. You would never leave jewelry in your tent overnight even if the other artists leave up their art.
My customers also let the sellers know which of their pieces are more popular by their comments as well as by purchasing. If I want to bring in new items, I have a good idea of which pieces I should discontinue. If one of my items has not sold well but seems popular, I will keep it around longer or possibly discount it to get it out of inventory.
When displaying items, you sell that go on your display booth walls, your back wall is viewed the most and your most impressive or best-selling items should be on display in this location. I also feel that if the flow of traffic is mostly one way, the front side wall that faces oncoming customer traffic is also a place for your popular wall items. I have sometimes placed a few of my wall hangings up that seem to get the customer’s interest, when these items may not be my best sellers. This could lead to a better chance for customers to stop long enough to decide to enter my canopy area and not just walk on to the next booth.
Video: 10 Tips for Selling at Art/Craft Shows! by Paige Poppe
Packing Carefully:
It is important to pack your artwork carefully. You should expect to damage or ruin some of your more fragile pieces every once in a while. This loss is just part of the art field. It is worth the extra time to pack the more fragile art items more carefully. Determining the proper packing materials specific for your art will in the long term reduce some of this damage risk. Sometimes it takes a while to find the right box, container, or packing material for your specific inventory.
Frames are generally brought home from the store or framer and just hung on the wall. In this situation, they do not have time to get damaged. At art shows, they travel and are handled much more. They are also out in the elements at outdoor art shows with the wind, sun, and rain. If you are not careful, the packing and unpacking will eventually damage some of your more fragile art. Most of my damage is on the frames and I take special care packing these items in specific. Of course, every seller will have their own items that are more fragile and may need extra packing.
Many sellers pack their smaller items and show supplies in plastic bins. Since the tops and bottoms are flat, you can easily stack them and transport them in bulk by a hand truck. They are also water-resistant and can add protection in bad weather. Many plastic bin sizes are available and many times the size of the items you sell will determine which bins are best for your needs.
I recommend that you purchase a sturdier or quality plastic container with a top such as the ones made by Rubbermaid. I have found that the less 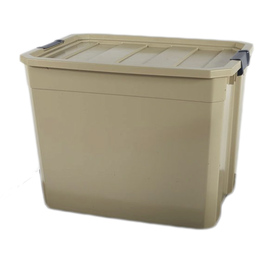 expensive plastic containers cannot take the abuse of art shows packing and unpacking and will eventually crack. The clear containers are convenient so you can see what is inside them but usually are much thinner plastic. The bin to the right that I use will fit many 16×20 matted prints perfectly and is available at Lowe’s Model # 131957 Blue Hawk 27-gallon tote (Click on for link for container) .
When packing my vehicle, I usually put the larger less fragile flat items such as tables or print bins in first on the bottom. Your heavy canopy would also probably go on the bottom. I leave the more fragile items for the top, such as the boxes containing my frames, so no weight is on them. The plastic container or storage box leaves a flat top on which you can place other art items or stack another plastic container.
Sometimes with smaller vehicles, there is a tradeoff on how much packing material you use to pack your items. Extra packing material for some items does take up more space, but sometimes you do not have any choice. Frames, pottery, larger glass items or other fragile or breakable items need to be packed well. Also, all very expensive items you sell should also be packed well.
See my Amazon Handmade gallery store with many art pieces on sale: Click Here to treat yourself or love one to a gift of art.
Setting Up:
At first, it will take a much longer time packing your vehicle for the art show, setting up, and packing up again. Over time this will get much faster. You will learn how to fit the items into your vehicle more efficiently and in which order to remove the items for a faster setup.
In your first few art show setups, give yourself at least two-three hours to set up until you get the hang of it. Once you have already decided how your display layout will look, it will take less time. You may need to try many different layouts until you settle on one that works best.
The seller always has the option to fill their vehicle with their art show supplies the day or afternoon before they drive to the art show leaving more time in the morning to do other things. The energy reserved for packing your car can go into your art show setup or with your customers.
I do not recommend doing a few art shows and then deciding to stop doing them because they are too much work and setting up your tent and booth is hard. It is a lot of work setting up but it does get easier and faster once you have a routine and know where everything goes.
If the art show allows you to set up the day before the show starts, take advantage of this option if you can. You can put up your tent, your tent walls, tables, print racks, display cases, and other materials as part of your show setup. Depending on your art/craft medium, you may be able to leave some of your product in the tent, but make sure they offer some security the night before the first day of the art show if you do this.
On the morning of the first selling day, you can arrive early and just need to bring your product and other materials not set up previously. One thing you need to be careful of is not to bring too many things over two days and then find out they will not fit in your vehicle when you take down your show on the final day. One advantage of setting up part of your tent the previous day is you will be less stressed and not as tired when the art show starts and you are talking to your customers.
It is best to be set up on time, but the detailed arranging can be done during the start of the show. You do not want to have your vehicle next to your tent still unloading when the customers are arriving at the opening. Many customers come before the official opening times to beat the crowds and the heat. These may be more serious buyers and if you are already set up, they will find you.
Usually, each art show sends you an art show information packet that may list the artist show rules, showtimes, location of the show, setup instruction, and other information such as parking or a map showing your tent location. It is a good idea to print this off and bring it with you.
After setting up, while you may be tempted to park right close to the art show since those spots are available before the show starts, I suggest that you leave those closer spaces for the customers. Many times, the art show requires the artist to park in an artist-designated parking area.
The art show information packet, which you should print out and bring to the show, will have much of the setup information. Sometimes it shows a map with your space number located on it. If it does not, then when you get to the show location look for a check-in table or the person who is running the art show to find where your location is.
It is a good idea to have a list of items you will need and review it as you are packing your vehicle. I tend to leave an important item at home every once in a while, and it is not so easy to run to the store or go home once you arrive and are setting up. If you are missing a common item while setting up, ask some of the other artists if you can borrow the item and return it when you are done. I tend to borrow from my art show supplies box such as a calculator, tape, or scissors and not bring them back and realize this when I need them at an art show. I now try to have extra of these items in my home and try not to borrow from my art supplies box that I bring to the shows.
One thing to consider is looking over the artist show information packet to see if it says how close your vehicle will be to your specific art location for unloading during setup and loading after the show. Many times, you can park right near your tent and other times it is much further. If you need to carry the art supplies far, you should bring a hand truck or other device. If you have done this show before, you probably know how close you can park. If you know that you will need to carry your art show items far, you should come earlier since setup will take a longer time for this show.
It is always easier to carry items with a hand truck and if you do not have really heavy items. You can get away with a less expensive $35 – $50 folding hand truck that folds flat and takes up very little room in your vehicle but you will probably soon replace it. If you do a lot of art shows, then it would be better to purchase a more expensive hand truck at the beginning. You need a hand truck that has larger wheels that can handle going over grass and over curbs.
************************************************************************************************
Purchasing items on Amazon helps me out supporting the cost of this article/free ebook. If you click on any Amazon item on this page this holiday season and then purchase any item on Amazon within 24 hours, even if that item is not listed in this article, I get a small referral fee and it costs you nothing extra. Thanks for your support.
************************************************************************************************
Hand Truck:
Different hand truck models can be found at your local hardware stores where you have the advantage of seeing them in person. Some different models can be seen online at Amazon
Additional models can be seen online at Walmart (hand truck samples).
Take down:

The takedown will be much faster than the setup. If I bring walls and framed art, I will start taking down those items and pack them about a half-hour before the show ends. This saves much of the packing time while much of my other artwork in print racks or on tables is still being shown for customers to purchase. If your display depends on the walls, a steady stream of customers is still around, or this is a major art show, then you should leave your display as is until the end of the art show.
Once the show is over, I feel it is easier to pack up all the remaining art supplies at one time and place them in piles. It is easier for me to pack my vehicle at once since it generally gets packed in a specific order and I have everything ready to go.
If customers are still walking around at the end of the show, I usually wait until about 15 minutes after the show ends to drive my car slowly to the closest area to my booth. Many artists drive in and park near their tents just as the show ends.
When you park, make sure you leave some space when you can for other artists to drive by to get to their locations.
It is generally frowned upon to start taking down your tent/booth and leave before the end of the show. In larger or juried art shows, this could lead to you not getting invited back again. If it is a local non-juried small art/craft show and numerous other artists are packing it up, then you can usually leave early also. You can always ask the promoter if you can leave early if others are. You should just carry your supplies to your parked car and not bring your car to the booth area blocking the customer paths or other artist booths.
Once I saw someone drive their car in and parked in front of their tent about 15 minutes before the art show ended. Some customers were still walking around and it is a big safety hazard as well as blocking customers from reaching other artists. In this case, the person supervising the art show noticed this, and the car was removed.
Booth Presentation:
In showing art, a good idea to keep in mind is that you are setting up a little gallery at the art show as if you were at an indoor retail gallery. Presentation is always important in the art world. 
I recommend going to some small local art shows or the larger ones in your area to check out how other artists are doing their presentations in your same art medium. It takes time to get a good layout and your booth layout will improve with experience.
The placement of your art and related display areas is also very important. Careful consideration should be given to where you place your tables, shelves, print racks, walls, and other items. Many people will walk down the row of booths, sometimes at a fast pace, and you need to give them a reason to stop and look for a few seconds to determine if they want to stay longer. So the very first impression on the customer is important not only on the quality of items you sell but how they are displayed. Many times some customers are only interested in certain types of items, so you will not get everyone to take the time to carefully view your booth or to walk inside your booth area.
The booth display pictured on the right has a very nice jewelry display. Notice the use of a grid wall on the left and the fancy tablecloth to add elegance. The great use of space by utilizing stacking of the jewelry displays on many different levels. For selling jewelry, you need a mirror.
You want to have enough artwork along the walking path to attract their attention and then explore more inside your booth area to examine more of your product. If your booth gets crowded, a design that takes into consideration the customer flow of traffic can help.
If you have your items displayed on your walls, you may want to bring a few extra pieces to fill any open spaces due to sales. If no replacements are available, you could rearrange the art on the wall. Another option is to write the word “Sold” on the art title card with a thick black marker and leave an obvious space on your wall. If it is more than a one-day show, you could bring a replacement item for that space on the following day.
Keep your booth area clean at all times and not so overcrowded with merchandise, sometimes more is not always better. When you design your booth layout, do not have spaces that the customer may feel restricted in. The customer should always feel that they have an easy way out.
Do not block too much of the space in the front area with objects or you will reduce the number of customers that walk inside your booth area. The booth layout entrance should be inviting to the customers. Sometimes it is a design challenge to have objects close to the front entrance of your booth so they can be easily viewed by the customer and the relationship to not blocking the main booth area entrance area.
If there is space between the different booths, you can display your art on the outward side walls giving you much more display space for artwork that can be displayed on a wall.
Do not have your artwork/product laying on the ground, especially on dirt or grass, that is normally displayed on a wall. I see many artists do this at our local smaller art/craft events. I have also seen this at the higher-end brick and mortar galleries as well but they have an indoor floor area that does not include grass.
Many times at smaller art shows and sometimes at the larger art shows, it is common for the artists to set up displays 1′-3′ out in front of their assigned 10′ x 10′ booth area. The problem with this is that the customers need to move 2′-4′ further away from the general traffic path when viewing your next-door neighbor’s booth. This makes it harder for them to see their art and more likely to just move on to the next booth. If your booths are right next to each other, I recommend that you keep your displays within your assigned 10′ x10′ area. This is just one of those things that will upset me when other artists do this. If the booths are spread out, you may be able to stick out a little and not disturb the next tent’s traffic flow.
Another item that many artists have in their booth is a larger wall sign or banner with the company name on it.
Purchase of art supplies:
This will vary with your art medium. Many times, I purchase items off of the web since specialty items are not often available locally. Online purchases can often give you a better selection and at a lower cost. When I first wrote this article, most online purchases were sales tax-free, but that has changed. At many places, shipping can be free or discounted if you purchase enough.
When ordering online, it does require a longer lead time to receive the merchandise. If the product is important to your business and not available locally, you need to make sure you order before you run out.
It is also nice to find a local store to purchase items you often run out of or need to replace regularly. I find many items I need at local hardware stores, local art stores, or general-purpose stores such as Walmart or Costco.
For local or in-State purchases, you may not have to pay sales tax when purchasing parts that go into the making of your art. Parts are items used in the actual art piece which could be in photography the photo paper, ink, matting, or frames as an example. For painting, it would include items such as canvas, paint, and frames. Many stores offer this tax-exempt status for businesses and you need to ask them. If they offer it, you may get a tax-exempt card that can be used for that store. You are required to show your state tax business number to the store to qualify.
Also when purchasing locally, ask the stores if they have wholesale prices for businesses that resell the items. A frame store may offer you good discounts not offered to regular customers. An example of this could be framing supplies such as molding, glass, hanging wire, or matting. You may also get a deep discount when the frame store frames your art.
Sign up for the email mailing lists of stores you buy frequently from. Many times, you will receive coupons for 40 to 50% off one item such as with Michaels or Hobby Lobby. Many other stores offer shipping discounts for web orders depending on how much you spend which can add up in savings.
Recommended art supply companies:
Note: I purchase products from the companies listed below except for Dick Blick which is more for painters.
Frame Destinations: www.framedestination.com Matting supplies, frames, mats, (clear bags link) , ( photo mounting corners link)
, (paper weights used for matting prints link)
, (bubble wrap pouches to protect your artwork link) .
Jerry’s Artarama: www.jerrysartarama.com General art supplies having physical stores and also on-line.
Dick Blick: www.dickblick.com Large art supply store.
Hobby Lobby: www.hobbylobby.com Large craft supply store, good discount coupons.
Michael Crafts: www.michaels.com Large craft supply store, good discount coupons.
Walmart, Home Depot, Lowe’s, Costco, and other local big box stores.
Good article on art show equipment supplies www.squidoo.com/Art-Fair-Equipment-And-Essentials
Matting supplies: Clearbags, mats, framing supplies, double stick tape and print racks
Clear Bags:
www.clearbags.com – These are the clear plastic sleeves that go over matted prints and come in a variety of sizes for most needs.
To be cost-effective, you usually need to buy in quantities of 100 in each size needed. Listed below are some common sizes 5 x 7, 8 x 10, 11 x 14 and 16 x 20 inches to fit:
Amazon also sells in quantities of 25 in many sizes. Clearbags come in a variety of sizes and different types of bags for jewelry or any other products that you may sell.
While I recommend the quality of Clearbags, if you have a Hobby Lobby nearby you can purchase smaller quantities locally at a reasonable price with their one item for 40% off coupon, they have (Crystal Clear bags link) .
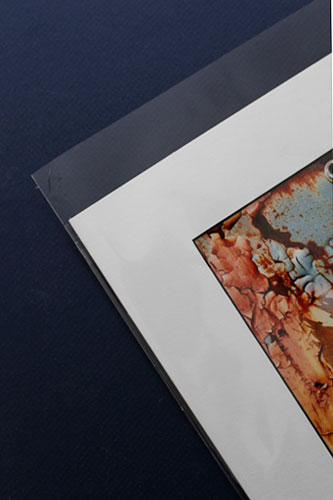
I recommend the bags called “Protective Closure”, for matted prints, which are the ones with the adhesive strip on the bag. I do not recommend the bags with the adhesive strip on the flap because the print will stick to the flap when pulling out the print. The clear bag shown to the right is over a matted print before the top flap is folded to the back.
You can see a short video showing the protective closure Clearbags here.
Mats:
I usually purchase my mats in bulk. I always have my outside mat dimensions at a standard frame size but my inside opening is custom-sized to display as much of my image in the 2 x 3 proportion I print at. You would custom size to your opening needs. Many artists select the mat color of white, but some use a black or colored mat. I currently use Antique white with a white core. I recommend using a white-core mat for artwork. White core mats will show a white center that you see in the inside cut beveled edge. The white core has only a slightly higher cost and avoids seeing that more yellow or off-color on the inside cut beveled edge found on cheaper paper mats.
When I list a mat size for the customer, I give the mat outside dimensions of the mat and not the picture opening size which I feel is standard in the industry. This better allows the customer to know the size of the frame the matted print will fit in. In general, the more you purchase in a quantity of a given size, the larger discount you get. Since mats in bulk can be heavy, take into consideration the mailing cost. Some places may seem more expensive but include the shipping into the price.
You can get custom mats cut at Matboard Plus or Dixie Matting listed below as well as many other suppliers. You can also buy your mats in bulk at a local framer if you have any in your area, but be sure to ask for a wholesale price.
Matboard Plus: Matboard Plus Wholesale matting at good prices.
Dixie Matting: www.dixiematting.com Wholesale matting at good prices. Call Bevin to order.
Purchase Pre-cut Mats:
Another popular option is purchasing matting kits that contain a quantity of pre-cut front mats and matching rear backing mats as well as sleeved bags. These ‘matting kits’ come in a variety of pre-cut mat sizes as well as quantities. You can also purchase the pre-cut front and backing board separately.
Framing Supplies:
Some of my favorite framing supplies are shown below. One is picture wire in bulk that is vinyl coated which is much easier to work with and will not hurt your fingers when winding up the ends.
I also find that using D-rings and matching screws work well to wire the back of a frame with the vinyl coated picture wire.
Over my artwork table, I use a larger protective green mat that is very cut-resistant and comes in a variety of sizes. I have used an X-Acto knife cutting mat on it for many years and it still looks good. These mats not only provide a flat surface with a grid pattern to align things up with but keep your art table from being cut up.
You can never have too many picture hangers. The picture hangers come in a variety of weights to hang frames of 10 lbs, 20 lbs., 30 lbs., and heavy frames. When you sell canvas or framed prints, it is nice to supply the customer with a picture hanger along with the purchase. This allows the customers to be able to hang the artwork when they get home. The brass ones make a nicer presentation.
Many artists use hinging tape to attach the front mat to the backing board and self-sticking mounting strips to attach the artwork to the backing board. Click on the photos below for further information.
ATG Gun with double stick tape and photo corners:
This device makes it easy to dispense the double-sided tape to your mats allowing you to quickly put your front and back mat together. I found that this tape allows you to separate your mats, at a later time, if you need to reuse them without any damage.
I use this applicator device and tape along with the photo corners shown below for a great combination in my matting method. This double-sided tape is also convenient to tack on your artist bio page to the back of your matted prints with a small amount of tape on the bio page’s back four corners. I now just place the artist bio page and certificate of authenticity in the Clearbag over the matted print. See the video below on how to use photo corners.
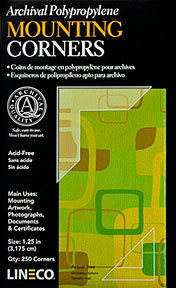
One of my favorite products is Lineco Archival Polypropylene 1-1/4″ Full-View Mounting Corners (250 corners). These make matting my 16×20 prints or smaller much easier and faster. These require a very little white border or image space of your print and you can easily remove your print from the corners with no damage and reuse your print or the mat.
Print Racks:
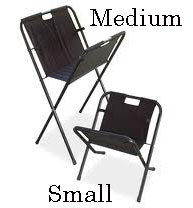
The small and medium print racks shown to the right, that I use, are very common at art shows. These print racks are reasonably priced.
I also purchase better quality rubber leg tips from Home Depot (print rack rubber leg tips, 4 pack link) .
Amazon also sells in larger quantities
These give the print racks more stability on uneven ground and only cost slightly over $2.00 for a set of four. These higher-quality rubber leg tips work well to replace the original plastic leg tips when they break off or you can fit them over the existing leg tips on a new print rack.

One advantage of using print racks is that you can place a lot more art in a smaller area. While you may have some of your art on the walls, you could have many times that quantity of art pieces in your print racks or print bins. In my case, I have most of my photography images matted and placed in print bins. A painter could also make prints of their paintings and place them in print bins. Having prints of your art can also add another pricing option to your customers who cannot afford the originals.
I have seen other artists put original paintings in print bins with a foam core or cardboard backing and clear bag. I recommend an artist that puts original art in the print bin to state that it is an original painting or your art medium name on each piece. This is so the customer does not confuse an original with a print. Any art medium that is flat and can handle customers repeatedly flipping through the different pieces would go well in a print rack.
You do not want the type that comes to a V point at the bottom as this design damages the bottom of the prints. The print racks with a flat base are much better on this and also hold more prints. Most artists use the canvas print racks but they also come in wood. You can use a small print rack to place matted prints about 11″ x 14″ in size and display them on a tabletop. A medium floor standing print rack will hold 16″ x 20″ mats with the jumbo print rack holding larger mat sizes. You can also use the jumbo print rack, shown to the right, to hold panoramic prints, larger matted prints, or a combination of mat sizes together such as two columns of 16×20 prints next to each other. I prefer the canvas print racks that fold flat for easier storage. One helpful hint is my recommendation is to tighten the screws on these canvas print racks every few months during the season since they tend to get loose, fall out and it is hard to find replacements for these screws.
Above are a few examples of small tabletop print rack (Jack Richeson), medium print rack (Jack Richeson), medium print rack (Creative Mark), jumbo or large print rack (Jack Richeson), and jumbo or large print rack (Creative Mark). These types of racks, fold flat when not in use taking up less space in your vehicle and storage.
Do not overcrowd your print racks with too many prints. Sometimes more is not always better in displaying art. If you have too many prints, then pick out a combination of your favorites, newest, or bestsellers to be included. With too many prints, you not only can damage the prints but it may be hard for the customer to see the whole image if not enough of an angle or space is permitted for optimum viewing.
Another option for displaying 11″ x 14″ matted prints or other similar small mat sizes, on a tabletop is using rectangular baskets that you can find at a variety of stores such as Michaels or Hobby Lobby. These baskets are often on sale for 40% off or you can bring a coupon for 40-50 off that these stores offer. To make sure you get the right size basket, it is recommended that you bring a sample mat to the store and try it out in the basket to make sure it fits well. Some people make their own custom wood boxes to display matted prints.
